Guest Bloggers Ali Decker and Amy Vautin
As part of Wheaton’s goal to bring the arts closer to the
Northwoods, Professor David Hooker with the help of studio assistant Mark Epler
has been leading a gaggle of six girls through the process of building and
firing HoneyRock’s first ever wood kiln. Wood firings are known for their
ability to bring together a community of artists due to their time and work
intensive nature. This communal aspect has found a natural groove at HoneyRock.
We have many camp staff members to thank for their willingness to participate
in the building process…thank you all!
For the past week we have been working almost non-stop to
build the kiln. We begin our day early, joining the rest of camp in breakfast
and devotions. After devos, we go straight to work. Our six student class is then
split into two groups, one of which begins the day laying and mortaring brick outside
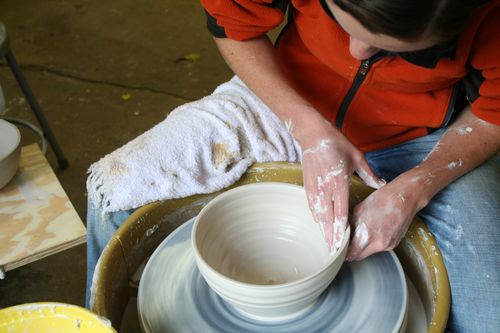
the ceramics studio while the other group remains inside making pot after pot
in hopes that we will have enough pieces to fill the kiln. We then work until
noon without stopping making sure our kiln walls are level and square and
throwing mugs, bowls, and other vessels on the three new wheels in the studio.
Happy for the lunch break, we run to the bathroom, desperate to rid our hands of
the clay and mortar that have worked their way up to our elbows and down the
front of our pants. After lunch, we return to the grindstone. The groups switch
tasks and work continues until dinner. After dinner, we spend a few additional
hours in the studio tending to our pots, trimming and adding handles until the
late hour of 9:30 at which time we generally hit the sack.
A wood fired kiln is an enclosed chamber constructed out of
brick that is used for hardening clay into useable ceramic ware. Unlike electric
kilns, wood fired kilns are fueled by wood that is placed in a fire box to
create flames that weave through the ware stacked inside, coating the pieces
with a layer of food safe wood ash. Bricked in holes on the sides of the
rounded kiln body allow for additional wood to be placed directly into the kiln.
These holes also allow for salt to be thrown into the kiln, creating unique
glazing effects on the pieces underneath. Across from the fire box at the end
of the kiln is a fourteen foot tall chimney. Pieces placed close to the fire
box will have a thick deposit of wood ash, while the pieces to the back of the
kiln close to the chimney will have a very light wood ash layer.
These days, we are a dusty bunch. Often I am reminded of the
Peanuts character, Pigpen, who has a resident dust cloud that surrounds him
wherever he goes. As I begin to yearn for a hot shower and wonder how I got
into this mess, I remember that on Friday, after a twenty-hour firing, we will
crack open the kiln and discover the ware inside. Every time a kiln is ready to
be unloaded, we students feel as if Christmas has arrived. As this is our first
time doing a wood firing, we are as excited as we are clueless about what to
expect when the kiln is opened. The physical labor of two weeks and the all
night stoking of the kiln will have been well worth it. We are so excited to be
a part of the process of making HoneyRock a home for the arts.
We’re
stoked (pun very much intended) for our upcoming firing in the middle of this
week. The Shakespearience students (see blog entry dated June 10) are planning
to celebrate alongside our class in a dedication ceremony that will ignite the
upcoming kiln firing. Having loaded ware into the kiln, strategically placing
the pots in relation to the fire box and the holes in the sides of the kiln, we
will begin building a fire in the fire box that will continue for close to
twenty-four hours. Be sure to watch for the flames shooting out of the chimney
during the firing!